

How to manually create an ODBC Connection for SOLIDWORKS PDM
Sometimes, users may encounter issues with SOLIDWORKS PDM databases hosted on an SQL Server named instance, where the client machines are unable to log into a local view or administration client. This is most likely because the ODBC connection failed due to the client machine being unable to determine the correct dynamic TCP port used to connect the named instance of SQL.
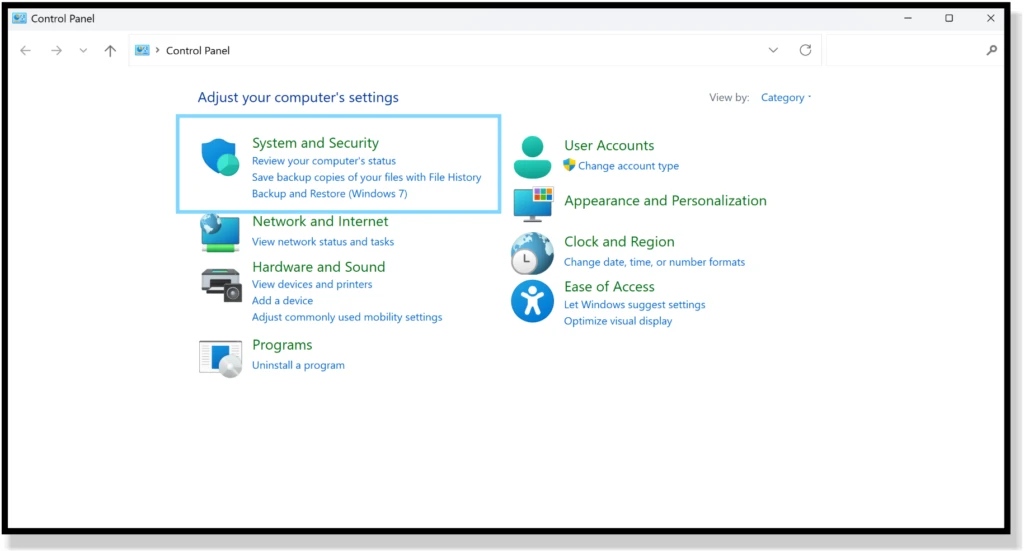
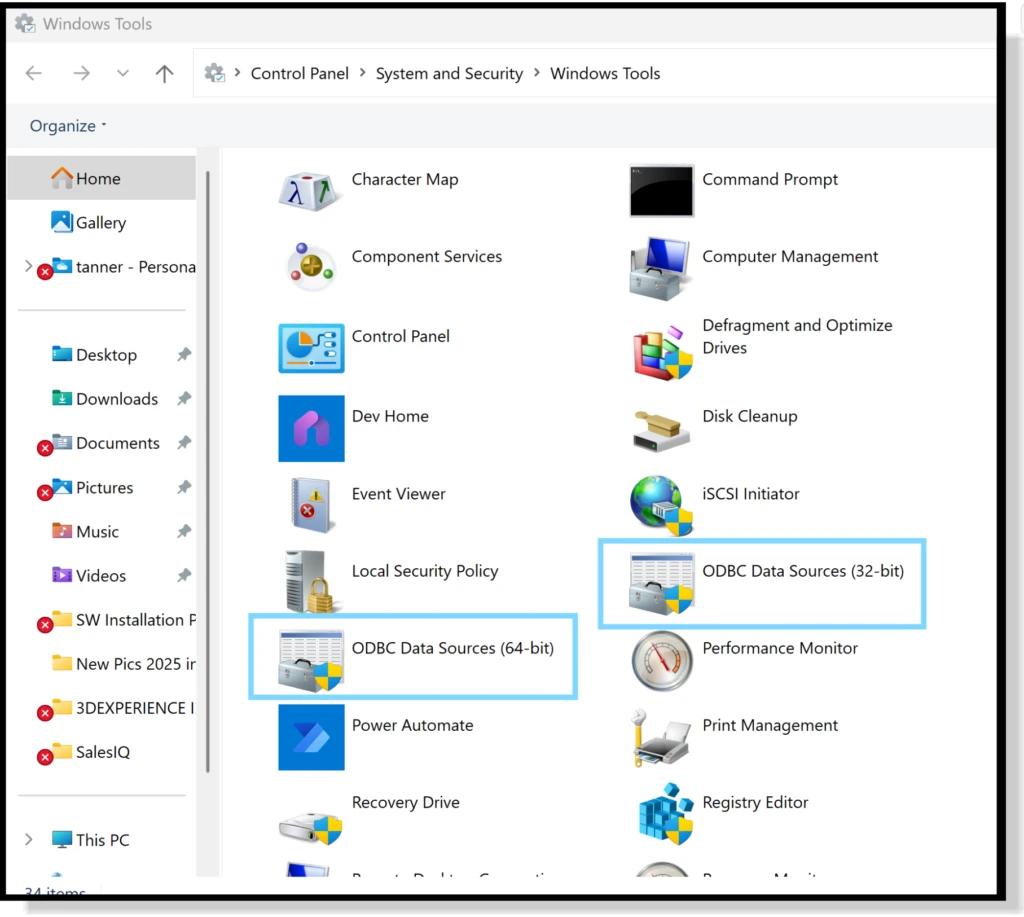
To manually create an ODBC connection, we will use the Windows Administrative Tools (Windows Tools in Windows 11). We will need to access both 32-bit and 64-bit Data Sources.

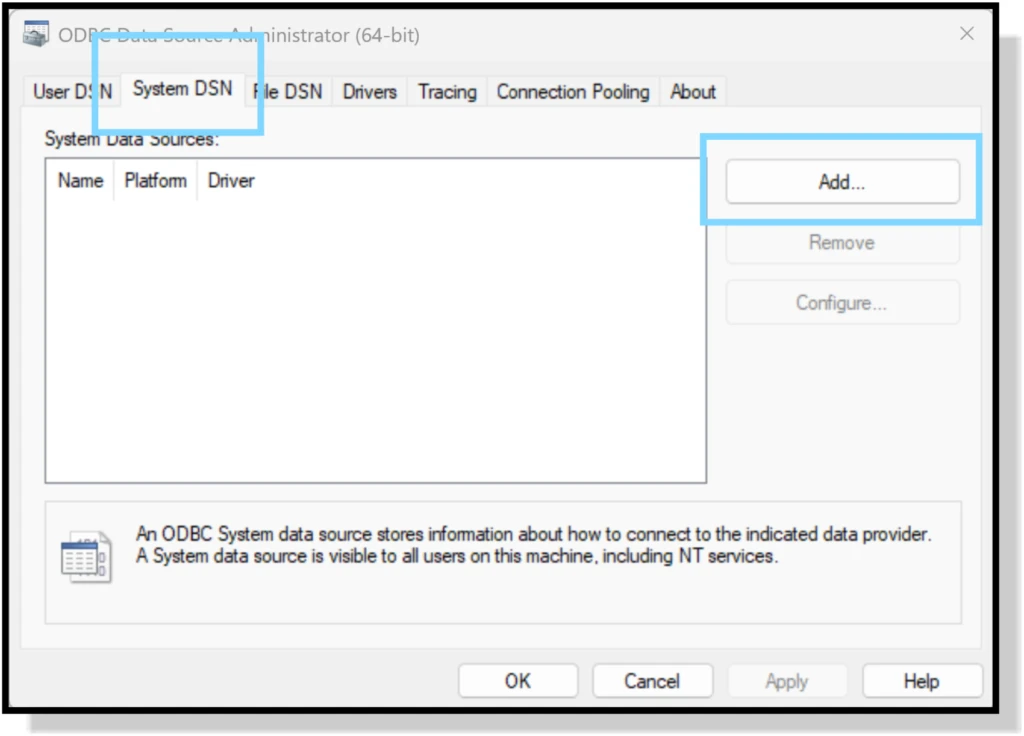
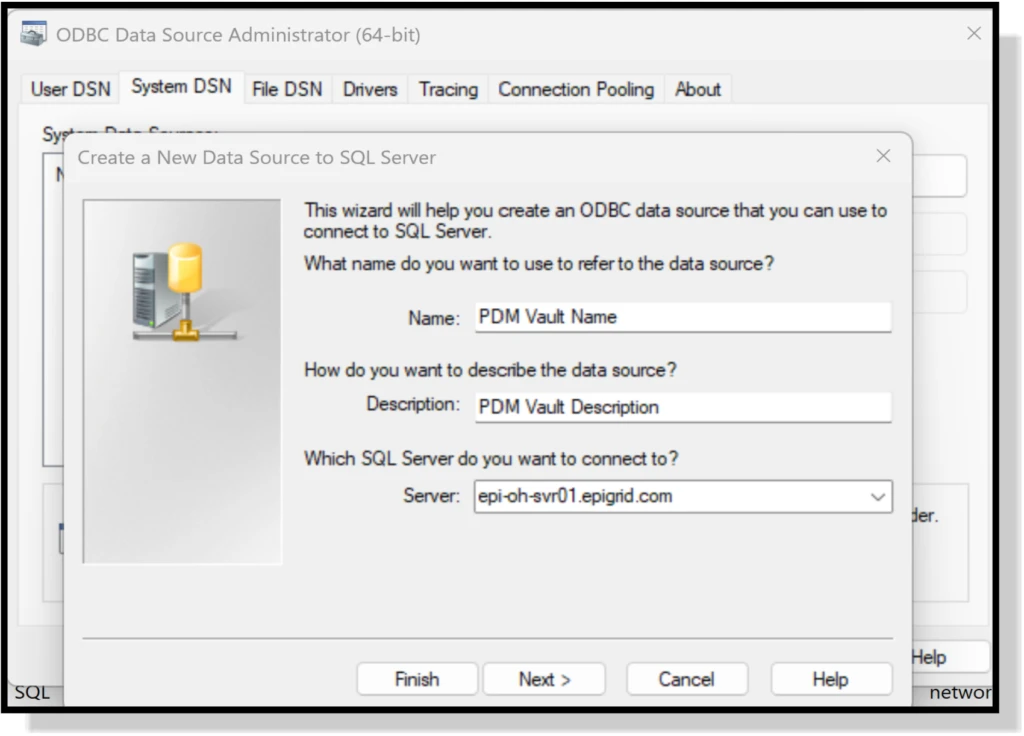
We will create the connection in the System DSN tab, click Add, choose SQL Server, and then click Finish.
Enter a vault name. We recommend using the actual Vault name you are connecting to. The SQL Server and instance can be entered manually or from the dropdown menu. Click Next.
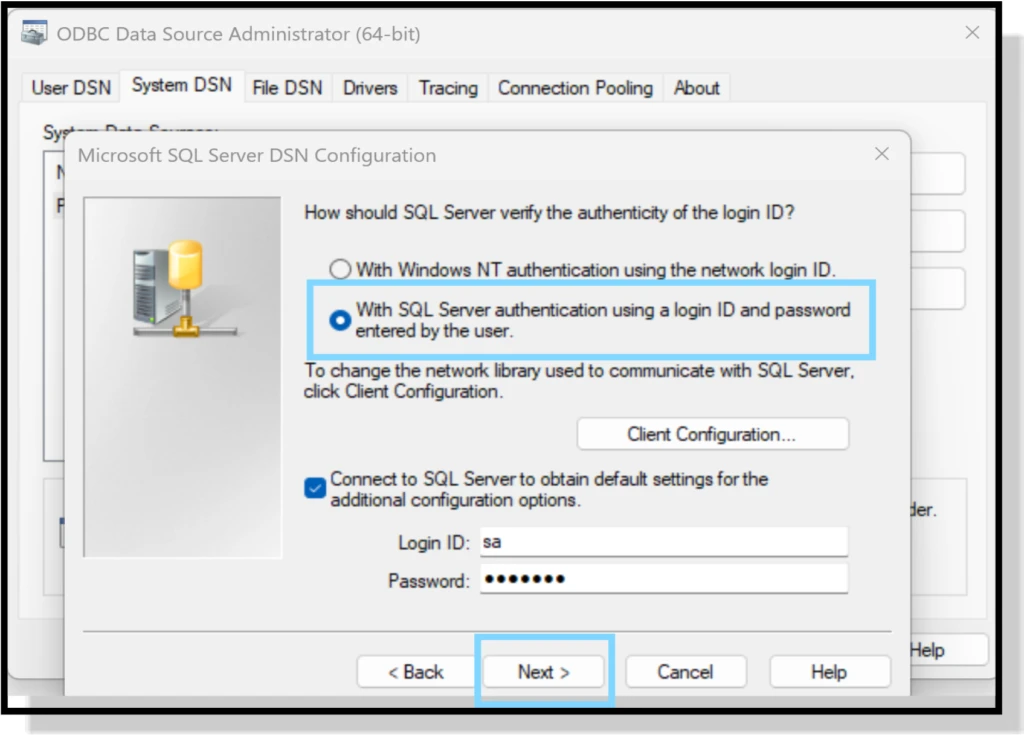
Select With SQL Server authentication using a login ID and password entered by the user and enter the SQL login ID and password (default login is SA).
Click Client Configuration.
Deselect Dynamically determine port (the default port for Database traffic is 1433) and click OK.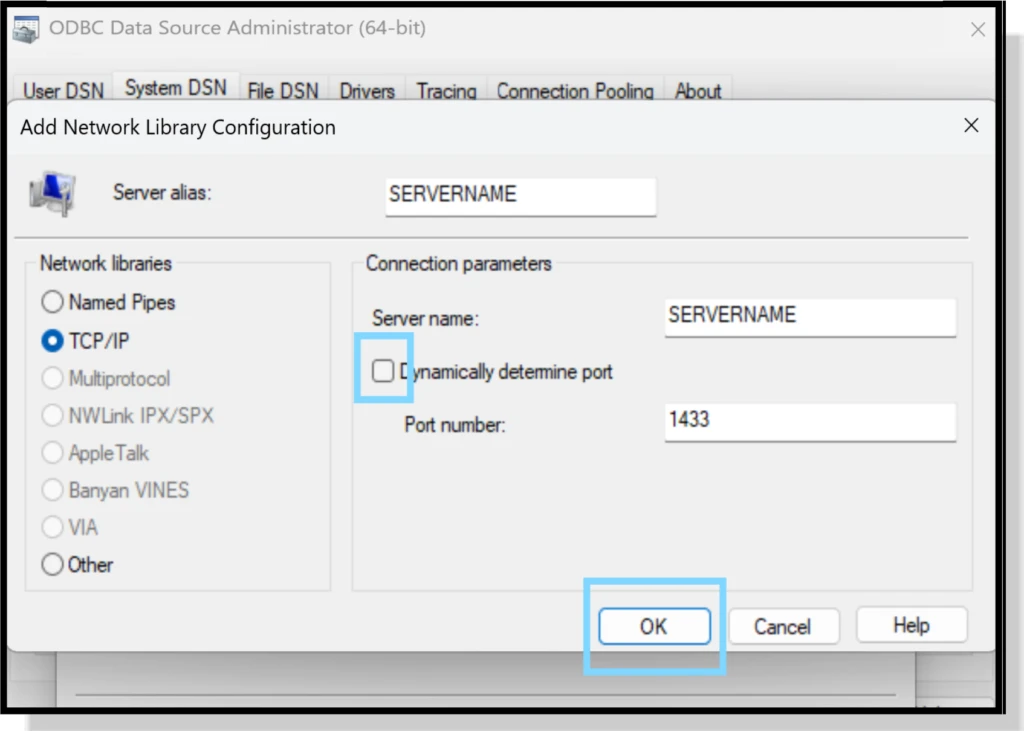
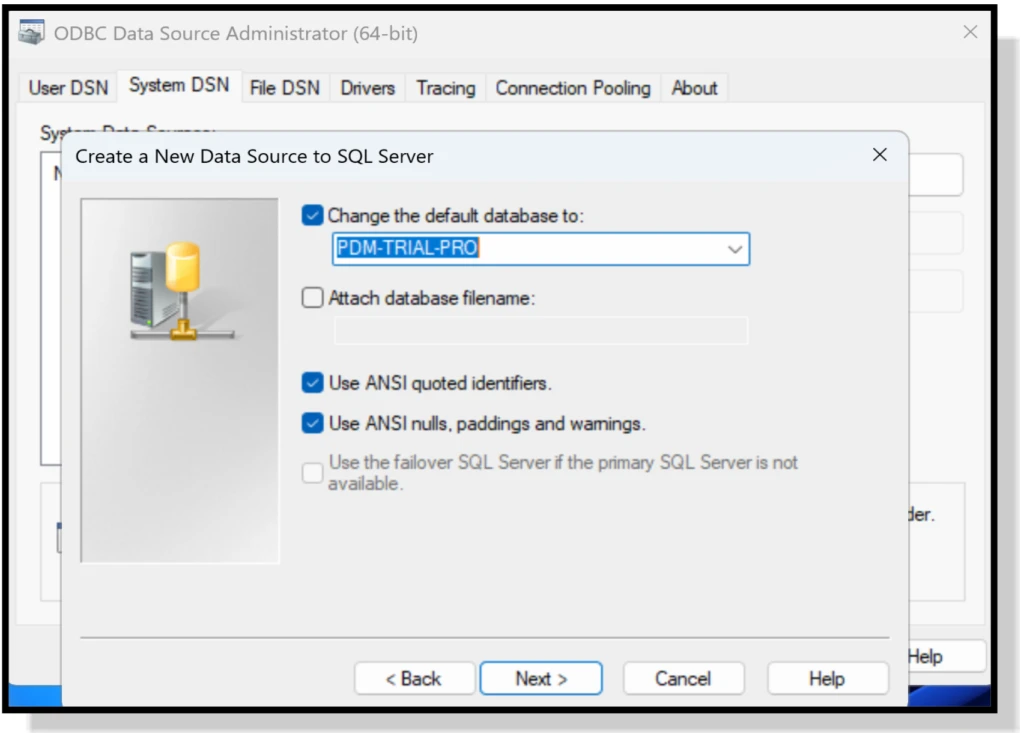
Check the checkbox for Change the default database to and select the SQL vault database from the dropdown menu we want to connect to and click Next.
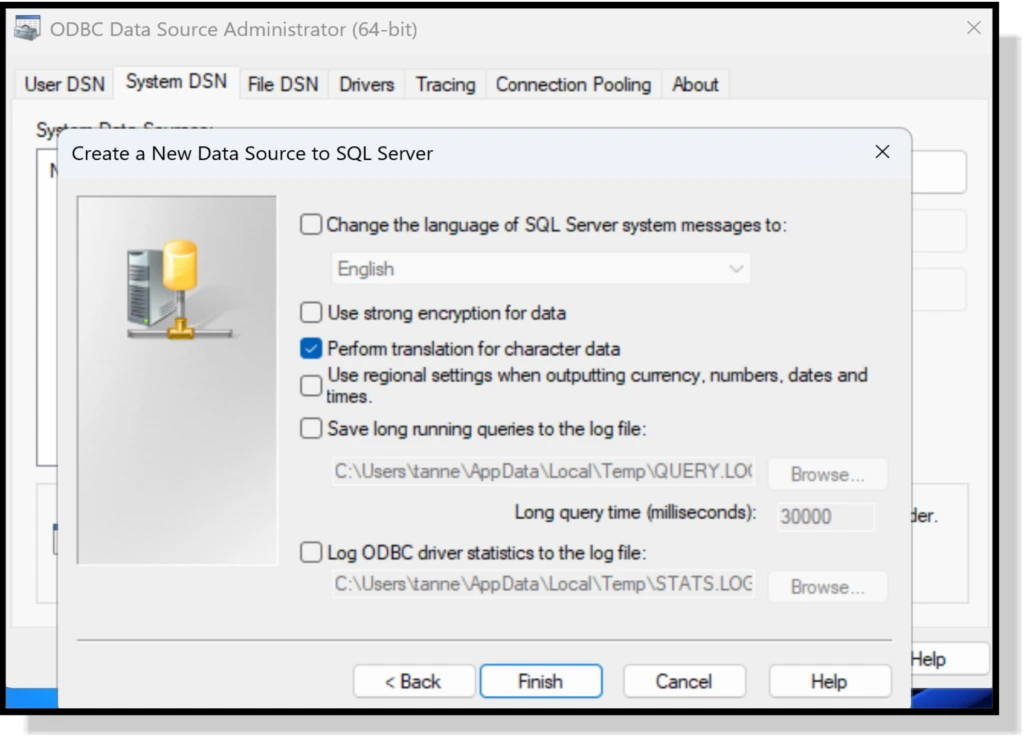
Leave all data fields with their default entries. Click Finish.
This window shows the configuration of the ODBC connection that will be created. Click Test Data Source.

The test results will be shown in the next window. Click OK.

Back in the ODBC Setup window, click OK to create the manual connection.

You will then need to repeat the exact process for the 64-bit connection as well. This will resolve issues where the client machine can’t log in to a local view or the administration client by creating a manual ODBC connection to the SQL servers named instance.