

![]()
SOLIDWORKS software requires installation on a Windows PC. This process is the same for all versions and Service Packs of the software.
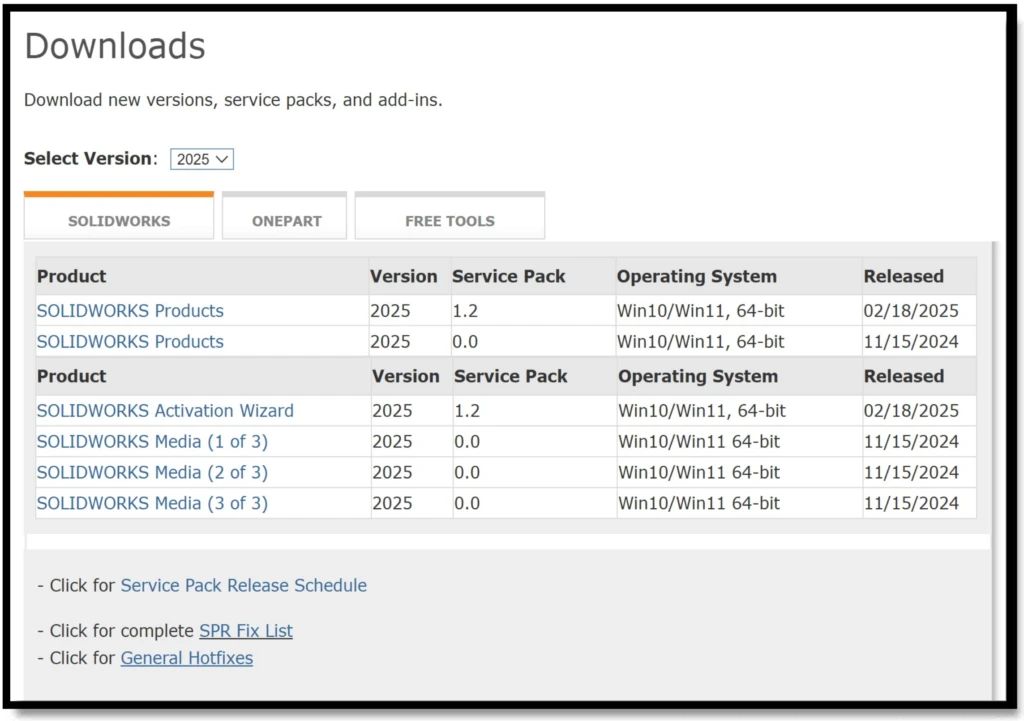
Step 1. Download the 2024 SOLIDWORKS Setup file.
All SOLIDWORKS setup files for all versions can be downloaded from here.
Step 2. Select the product you want to install, accept the terms and conditions, and then click download.
Step 3. Once you've selected the correct version and service Pack, you will be presented with this option to "Download and Install SOLIDWORKS", click "Download":

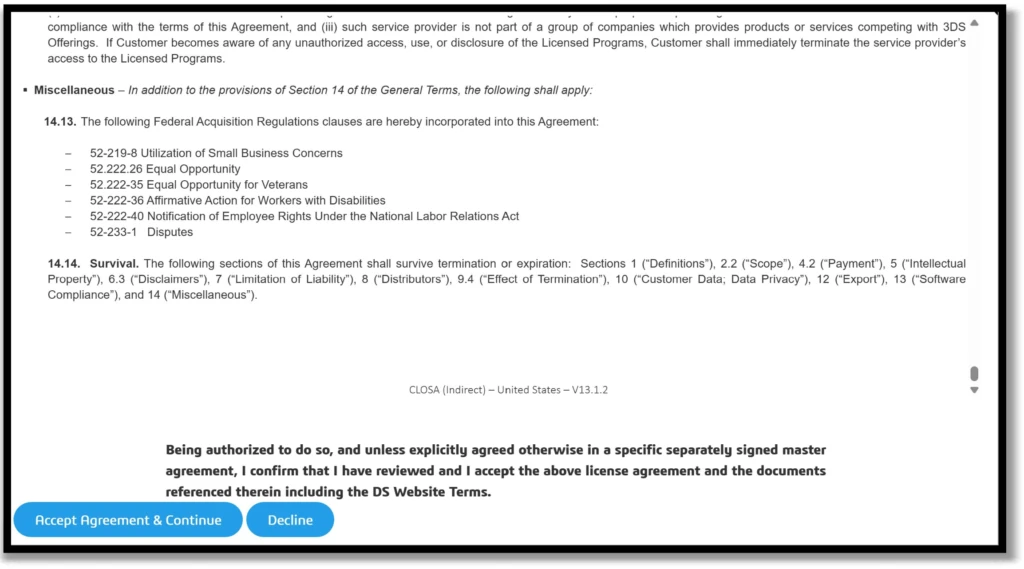
You will then be asked to accept the terms of the user agreement. Scroll to the bottom of the page and click "Accept Agreement & Continue":
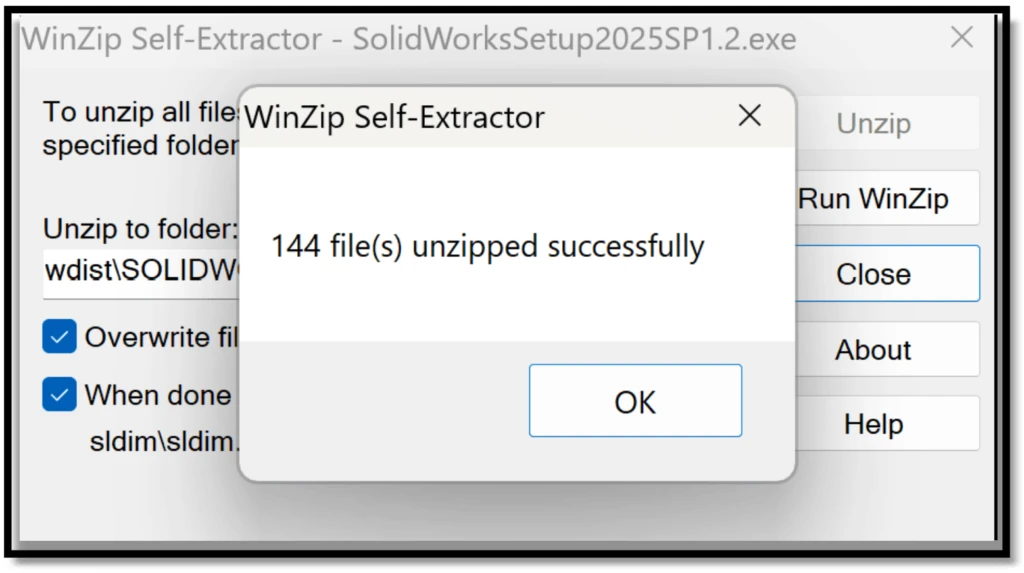
Your SOLIDWORKS Setup files will then download to your specified location. Find the setup file and run it:
![]()
Once you run the file, you will be prompted with the following window, where you should select "Unzip".
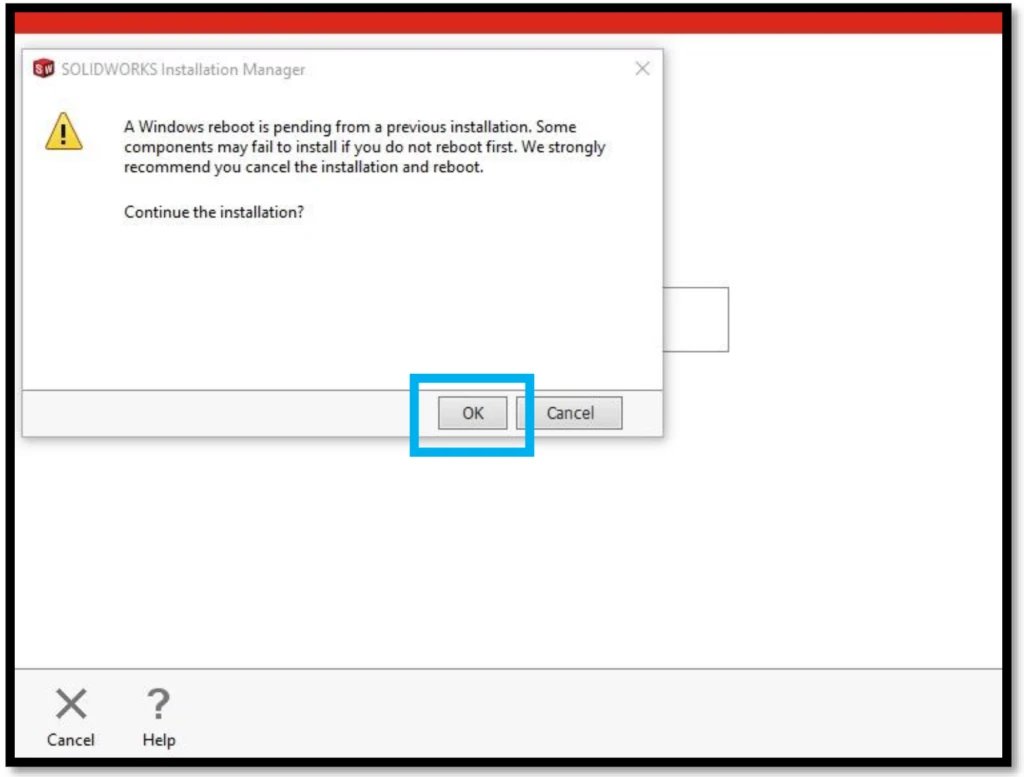
If this pop up shown in the screenshot below pops up, reboot your computer. If it pops up again, you can select OK and it will not impact the installation.
Step 4. Select "Individual (on this computer)". Then press "Next".

Step 5. Enter your serial numbers. If you have purchased multiple products, you will enter each SN in the appropriate field. Then press "Next".

Step 6. Select "CHANGE" right of the ‘Products’ tab.
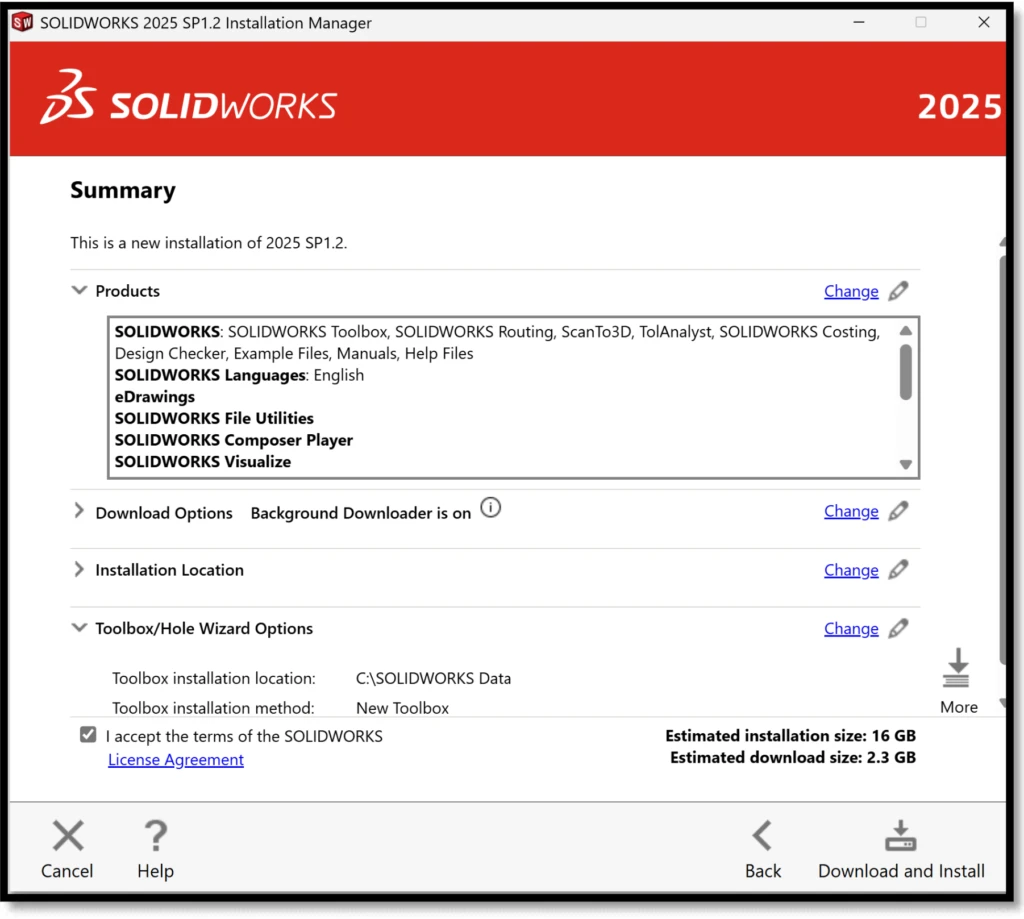
Step 7. Select or deselect the different options depending on what you would like to install on your local computer. This is the screen where you will find the PDM Client if your organization utilizes a PDM Standard or Professional Vault. Then press "Back to Summary".

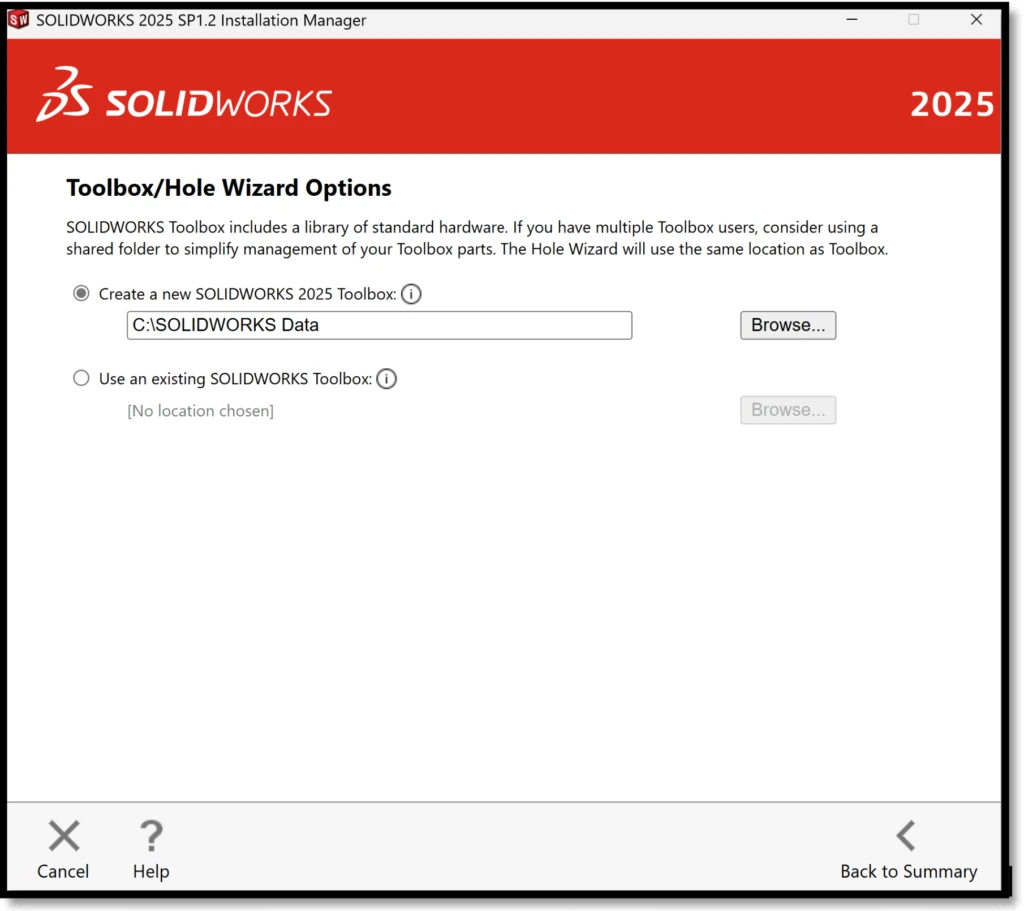
Step 8. Select "CHANGE" right of the ‘Toolbox/Hole Wizard options’ tab. If a previous Toolbox folder is installed, select to upgrade the toolbox in the installation method window. There is no need to copy the toolbox if upgrading.

Step 9. Select "Create a new SOLIDWORKS 2025 Toolbox”. Select “Back to Summary”. If you would like to use an existing toolbox and upgrade it, select the second radio button.
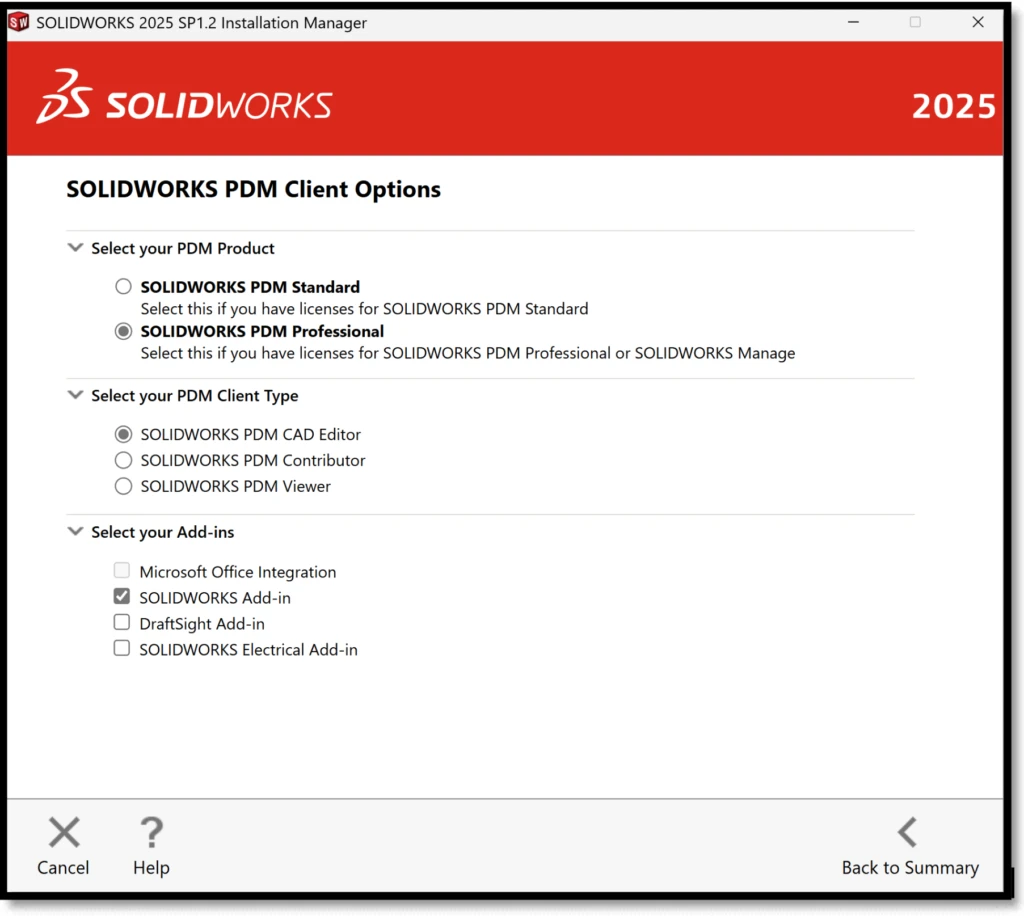
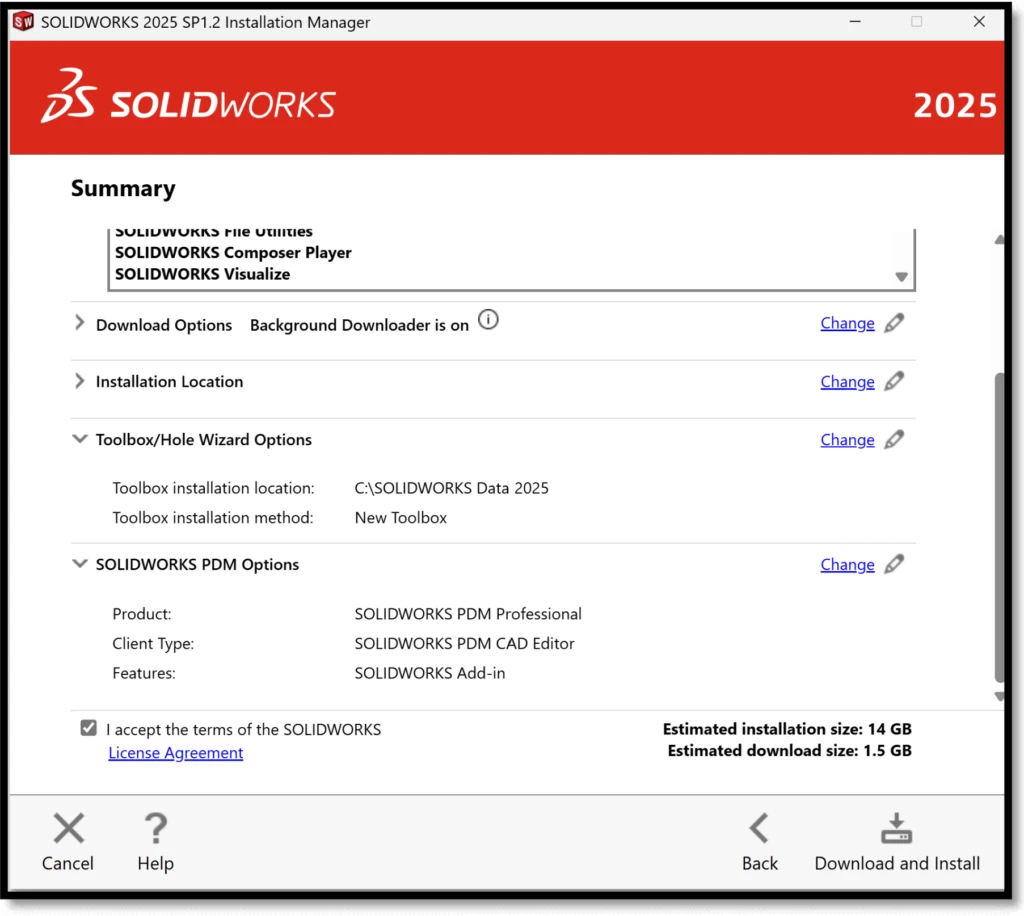
If Installing PDM, click change next to the SOLIDWORKS PDM Options:
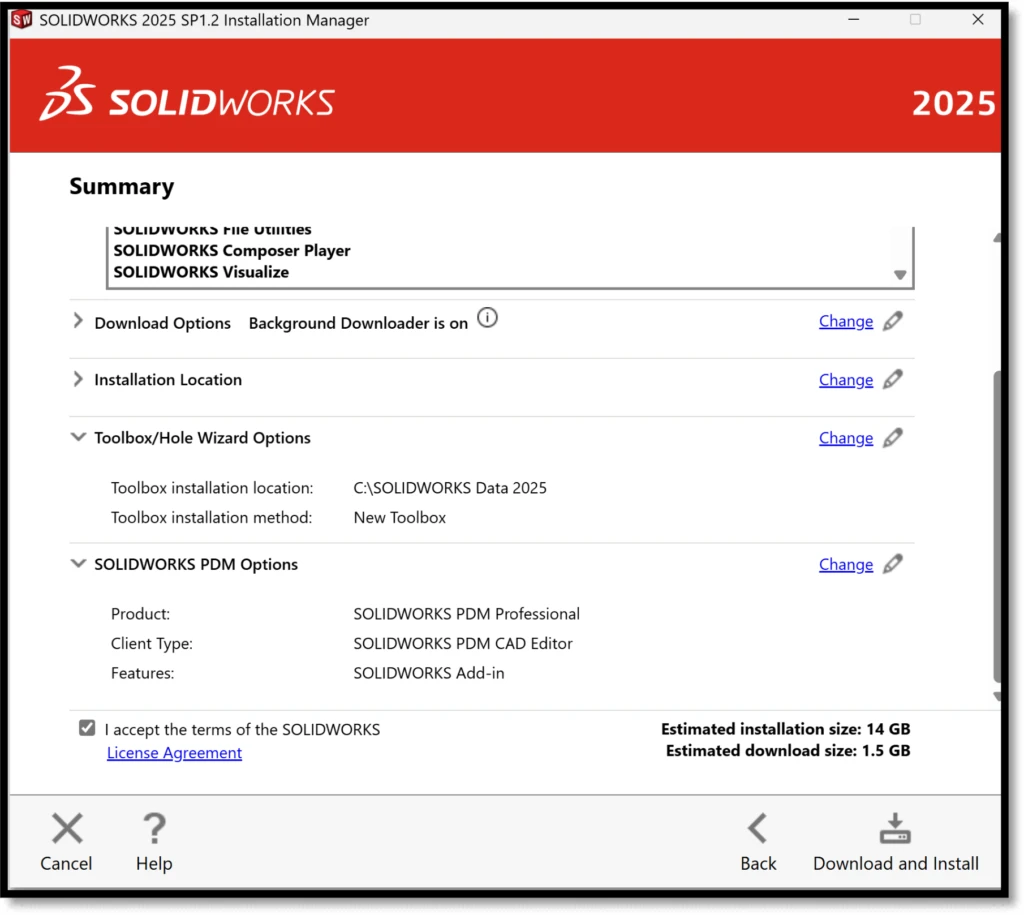
Make sure you select the correct version of the PDM client to install, either SOLIDWORKS PDM Standard or Professional, as well as the correct PDM Client Type, and select any additional PDM Add-ins you'd like to install, and click "Back to Summary":
Step 10. Accept the terms, then Select "Download and Install".
If installing SOLIDWORKS using a SolidNetwork License (SNL - License begins with 9010), you will be asked to select a port to connect to the license server. That port is typically 25734@"YOUR SERVER NAME", just be sure that you are connected to the server, and to enter your server name correctly after the port. Click"OK".

The SOLIDWORKS Installation Manager will then provide a real-time status on the download of installation files, as well as the installation of them once downloaded:

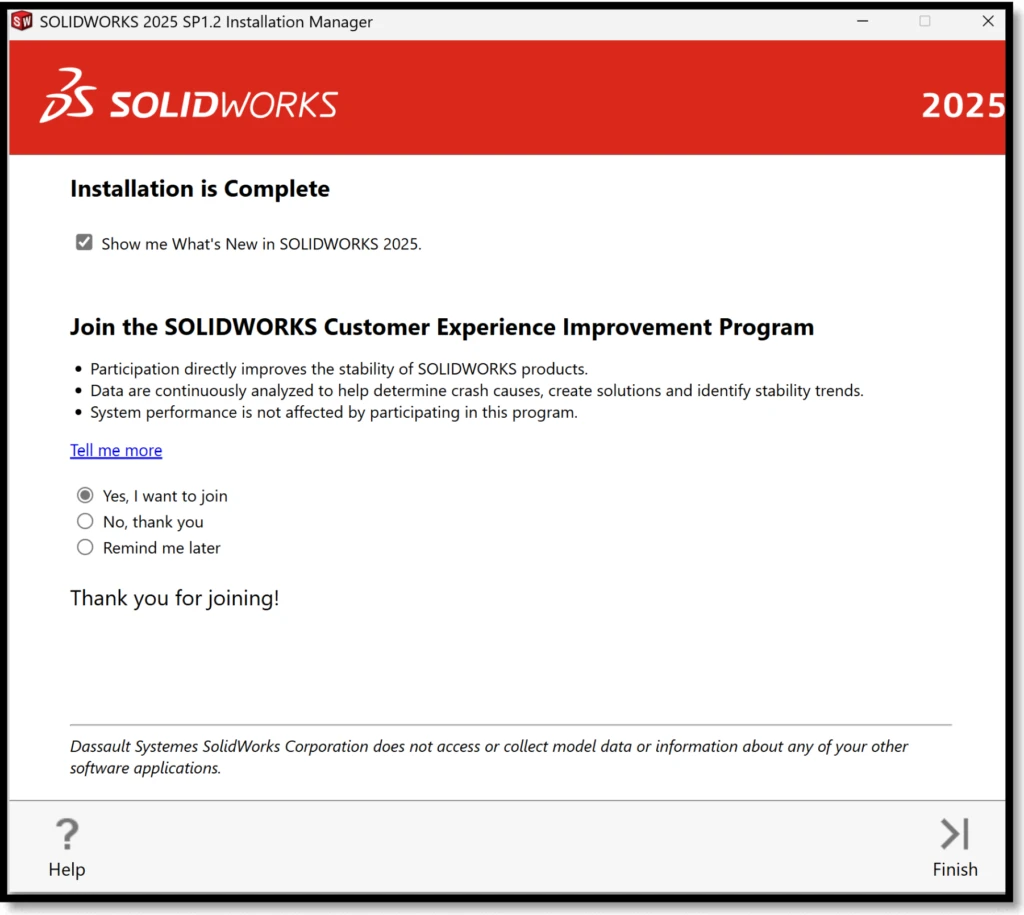
Once finished, you will be presented with this final screen asking if you would like to join the Customer Experience Improvement Program. There is also a what's new PDF you can view after the installation by checking the box. Select your preference and click finish to complete the installation:
This completes the installation process.