

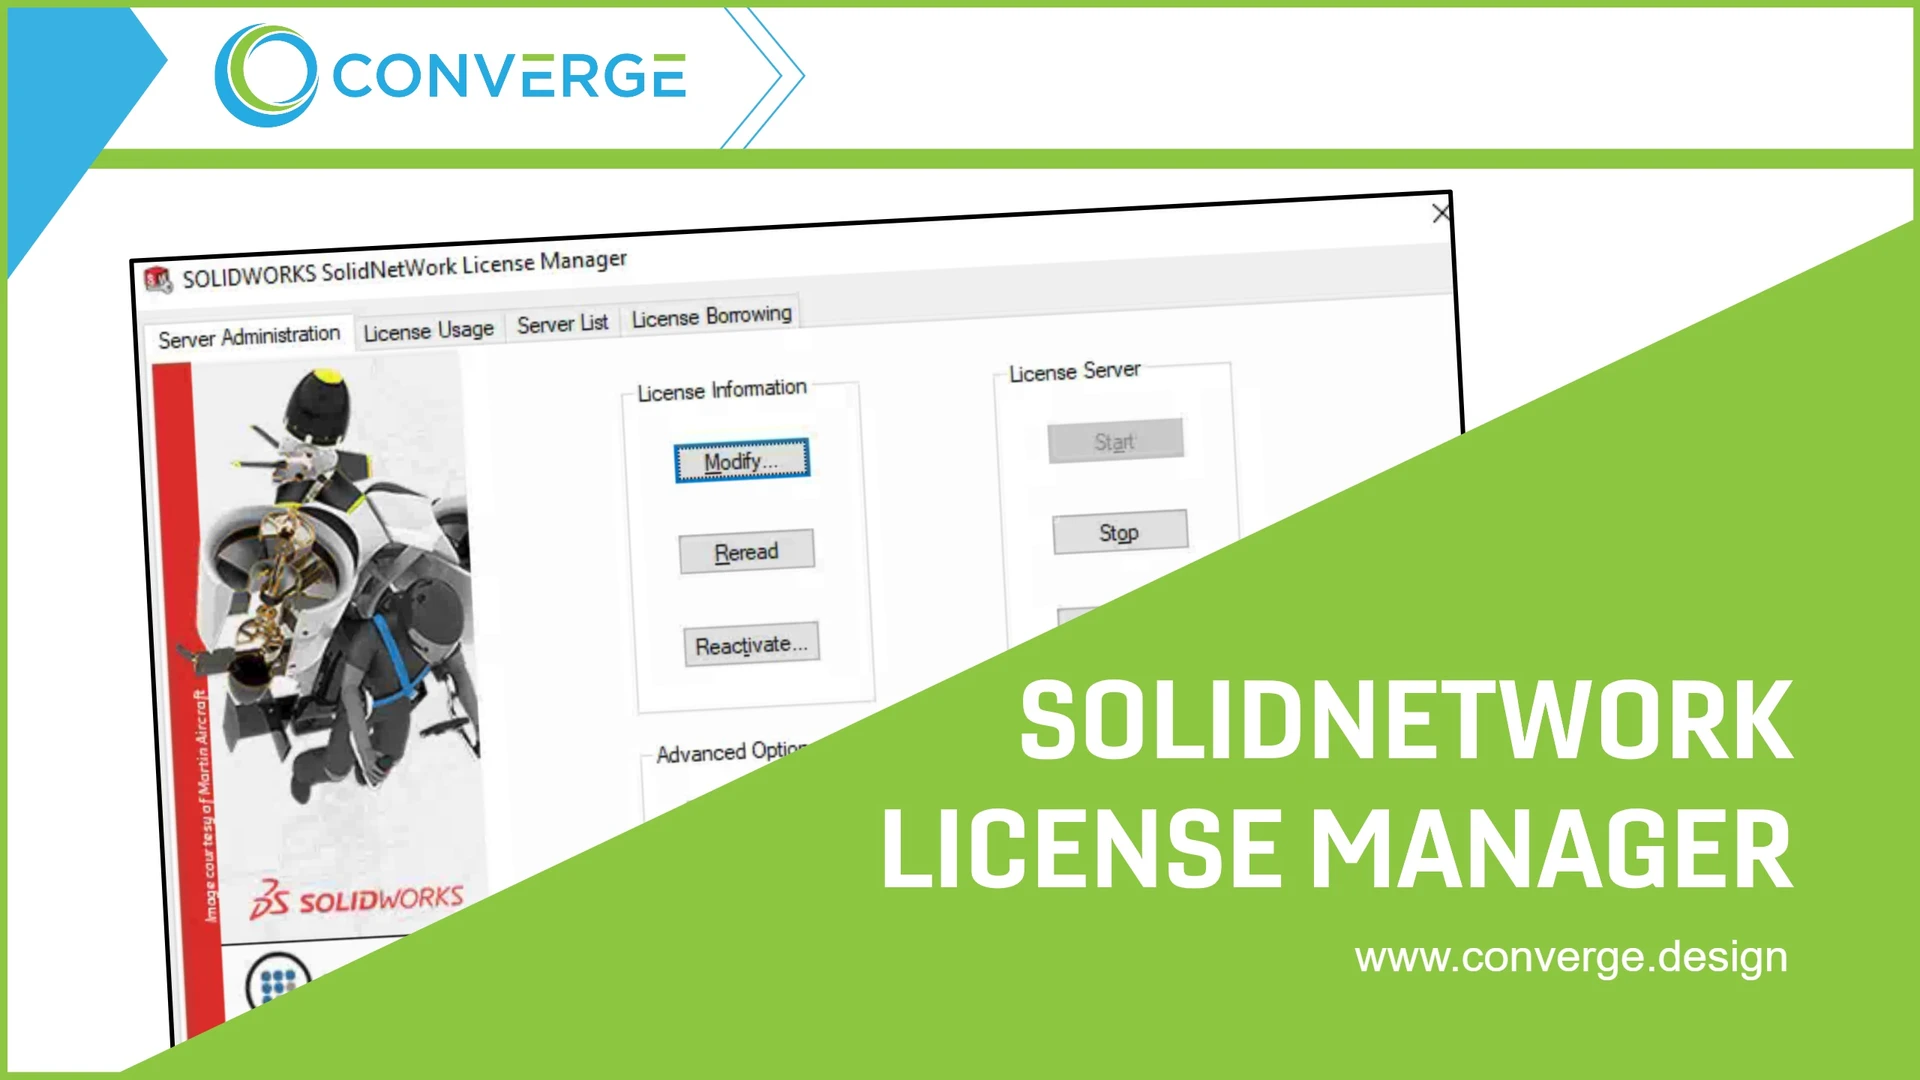
What is SolidNetWork License Manager (SNL Manager)?
The SolidNetWork License (SNL) allows for multiple users to share licenses for SOLIDWORKS CAD, PDM, Simulation, etc. Licenses are kept in a shared pool where they are utilized on a first come first serve basis by default. They may also be borrowed from and returned to the pool for a time duration.
Network vs. Standalone Licenses
The main difference between SOLIDWORKS network licenses and standalone licenses lies in how they are managed and used:
Standalone License:
- A standalone license is tied to a single computer or workstation. It allows one user to run SOLIDWORKS on that specific machine.
- This type of license is convenient for individual users who primarily work on one computer and do not need to share the license with others.
- Standalone licenses are typically activated directly on the user's computer using a license key provided by SOLIDWORKS.
Network License:
- A network license (also known as a floating or pooled license) is hosted on a license server and allows multiple users to share a pool of licenses.
- The number of users who can run SOLIDWORKS simultaneously is determined by the number of licenses purchased and available on the server.
- Users connect to the license server over a network to check out a license when they start SOLIDWORKS and check it back in when they close the software.
- This type of license is beneficial for organizations where several users may need to use SOLIDWORKS but not necessarily at the same time.
How to Install and activate a new SNL
Download the SNL Manager Software:
- Obtain the SolidNetWork License Manager software from the SOLIDWORKS Customer Portal or through your SolidWorks reseller. Ensure you download the version that matches the SOLIDWORKS version your organization is using.
Prepare the Server:
- Choose a server machine that meets the system requirements for running the SNL Manager software. Typically, this is a dedicated server or a machine that can be left on and accessible to all users who need to run SOLIDWORKS
- Newer versions of the SNL Manager can work with older versions of SOLIDWORKS.

- On the Summary page, you can customize the install location or accept the defaults.
- Check the checkbox to accept the terms and click "Download and Install" to begin the installation.
Activate the License Server:
- After the SNL Manager is installed, you will need to activate it using the SolidNetWork License Activation wizard.
- Obtain the serial number(s) you wish to activate on the new SNL Manager. This serial number should be provided by SOLIDWORKS or your SOLIDWORKS reseller.
- On the server, navigate to the Start menu (or search) and launch the "SolidNetWork License Manager Server" application.
- Upon opening the application, a prompt will appear to add and activate licenses. Click "Yes" to open the Product Activation wizard.
- In the Product Activation wizard, ensure the computer name is correct. You can also customize the SNL port (default is 25734). Click "Next".
- Click "Add" and type or paste your serial number(s). Enter each serial number on a new line. Click "OK". Ensure the serial number(s) is entered correctly or an error message will appear when you click "OK".
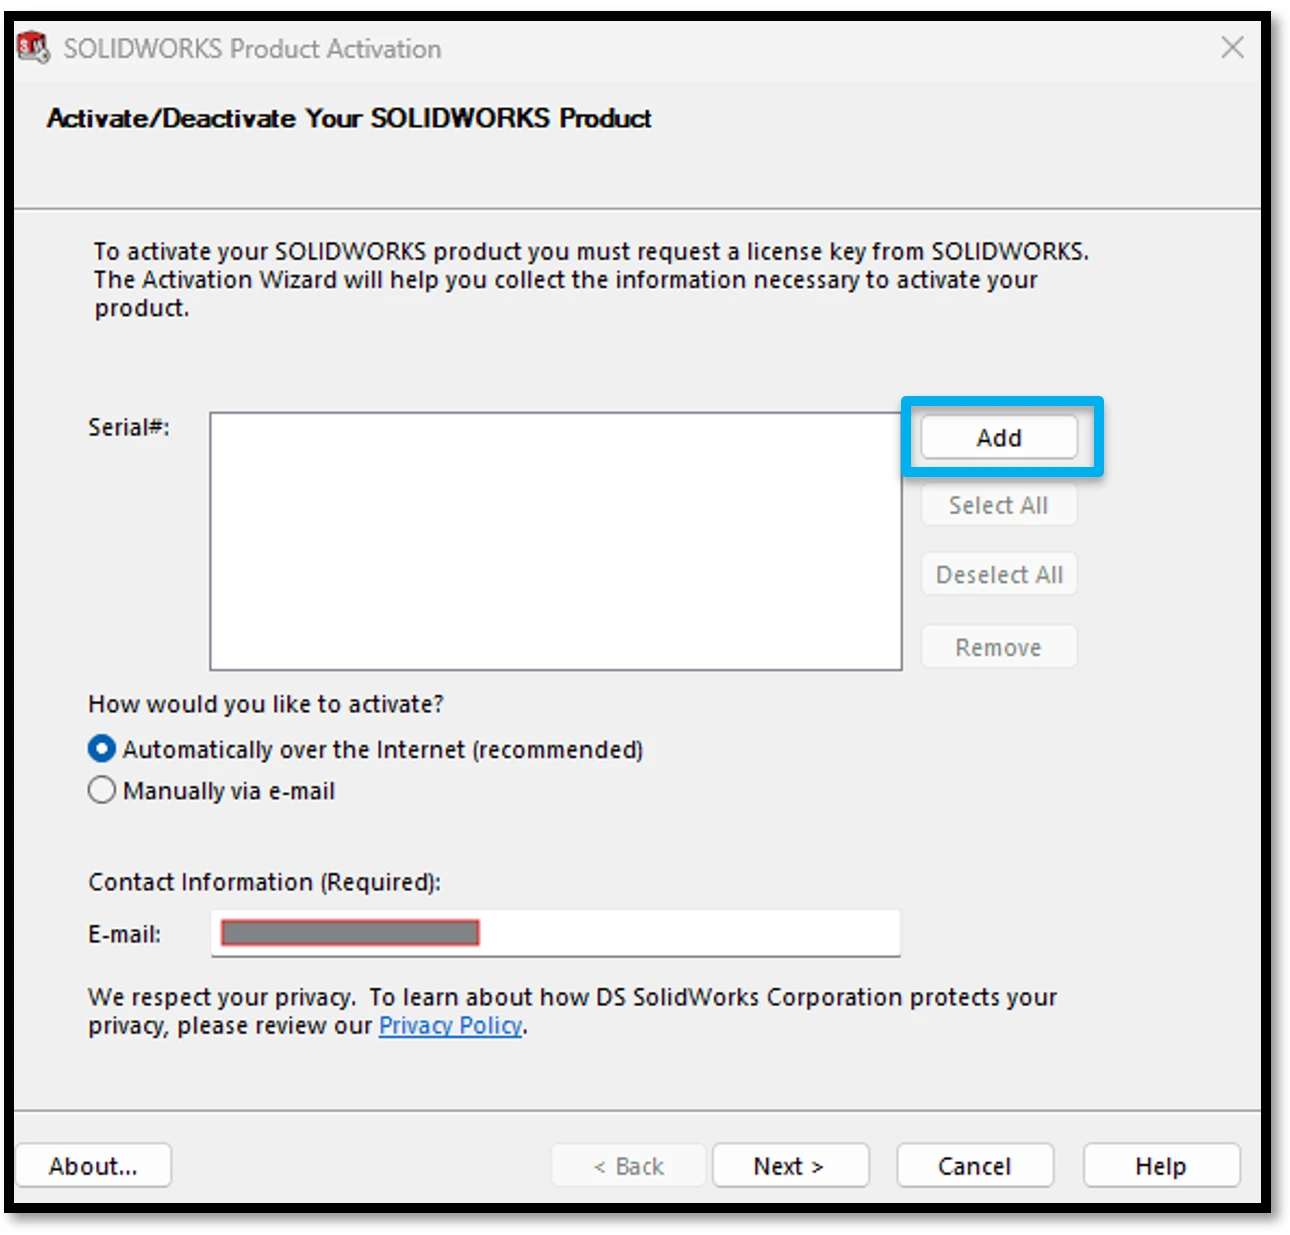
- Click "Select All" to highlight all listed serial numbers.
- Enter an email address in the "Contact Information" field and click "Next" to begin the activation process.
- Once activated, you should see a confirmation message indicating that the license has been successfully activated.
Distribute License Server Information to Clients:
- Note: If client is only using PDM, this step can be skipped entirely.
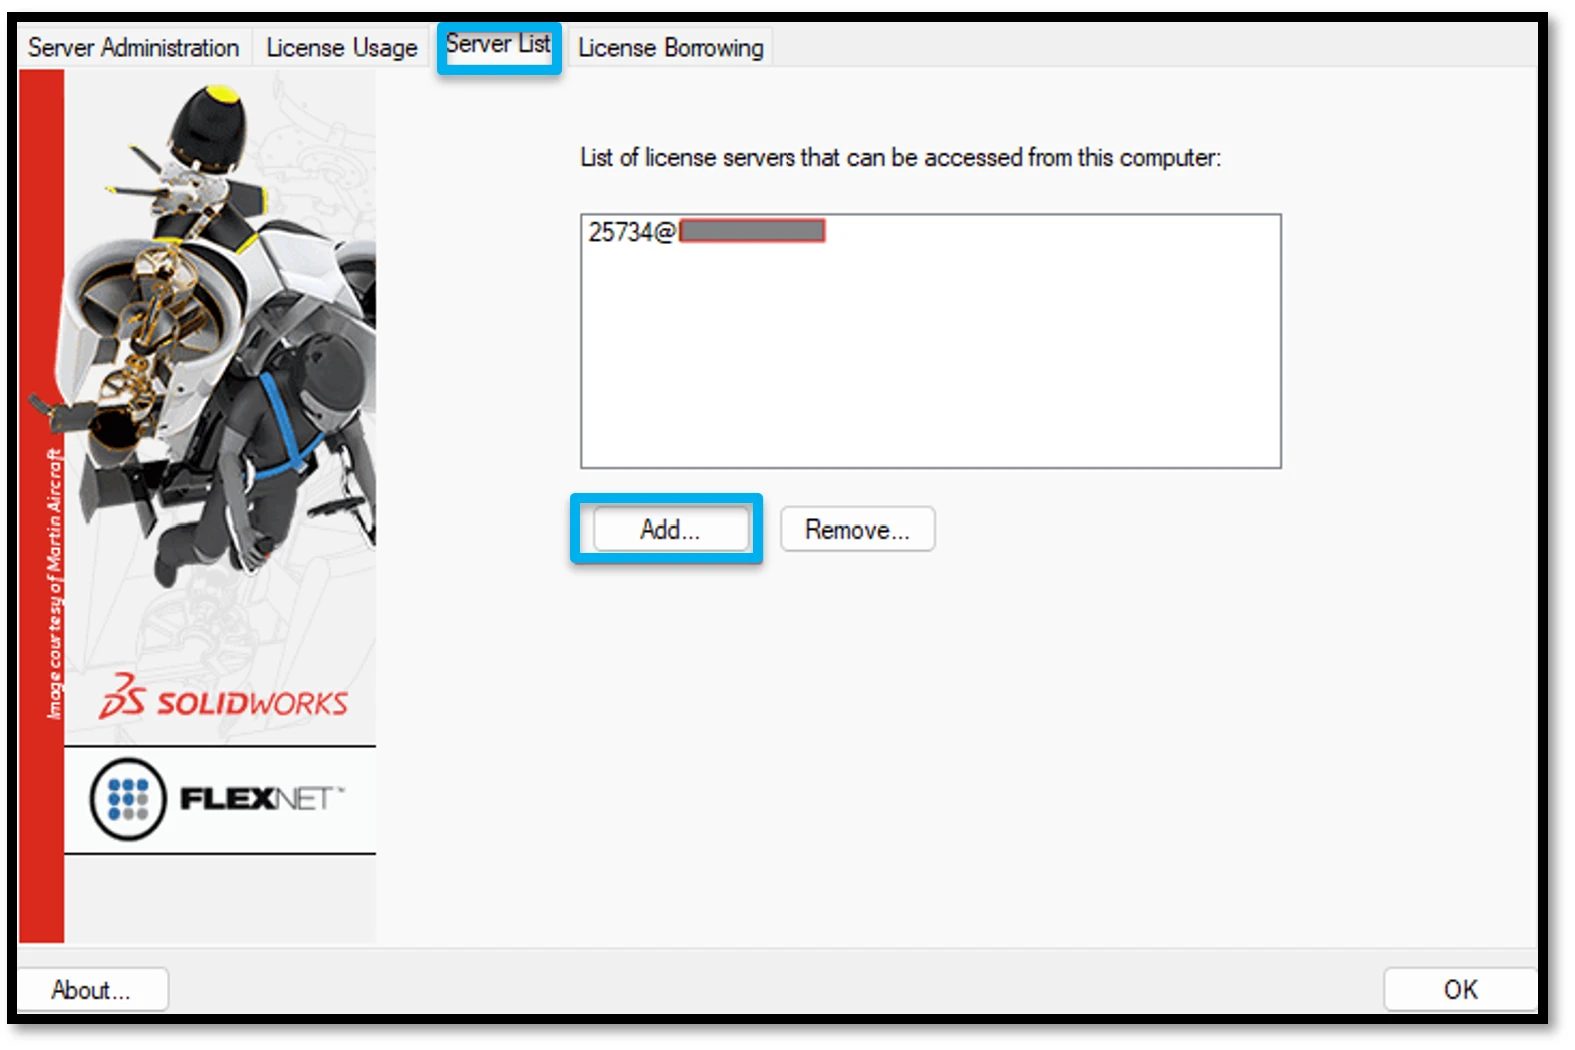
- Once the server is set up and running, distribute the SNL address to all client machines running SolidWorks products.The SNL address for clients will be in this format: [Port Number]@[Hostname] (ex. 25734@Server01)
- Clients will use the SNL address to configure their SolidWorks installation to point to the license server. This is typically done either during the initial SolidWorks installation or through the "SNL Manager Client" app on the client workstation.
- To add the SNL address through the "SNL Manager Client" app, navigate to the Start menu (or search) and launch the "SolidNetWork License Manager Client" application.
- Click the "Server List" tab and click "Add" to add the SNL address.
Test Client Connectivity:
- After configuring clients to use the network license, test connectivity by launching your SOLIDWORKS app on client machines and verifying that the SOLIDWORKS application can obtain a license from the server.
- To test connectivity for PDM, ensure that the client can successfully log into the PDM local view.
How to Add and activate Additional Licenses to an Existing SNL
Obtain the New Serial Number:
- First, obtain the new serial number you wish to add to your existing SNL setup. This serial number should be provided by SolidWorks or your SolidWorks reseller.
Access the SolidNetWork License Manager (SNL Manager):
- Log in to the server where the SNL Manager is installed. You will need Windows administrative privileges to the server to perform the subsequent steps.
Launch the SolidNetWork License Manager Server Application:
- On the server hosting the SNL, navigate to the Start menu (or search) and launch the SolidNetWork License Manager Server Application. This utility is used to manage the licenses on your server.
Stop the License Server:
- In the SNL Manager application, go to the "Server Administration" tab.
- Click the "Stop" button to stop the license server service temporarily. This step ensures that no changes are made while the license server is running.
Add the New Serial Number:
- Click the "Modify" button to open the Product Activation wizard.
- In the Product Activation wizard, ensure the computer name is correct and click "Next".
- Click "Add" and type or paste your new serial number(s). Enter each new serial number on a new line. Click "OK". Ensure the serial number(s) is entered correctly or an error message will appear when you click "OK".
- Click "Select All" to highlight all listed serial numbers.
- Enter an email address in the "Contact Information" field and click "Next" to begin the activation process.
- Once activated, you should see a confirmation message indicating that the license has been successfully activated.
Start the License Server:
- Once the new serial number is activated successfully, click on "Start" to restart the license server service. This action makes the new licenses available for use by clients.
Verify License Availability:
- In the SNL Manager, click the "License Usage" tab, select the "Product" from the dropdown list, and ensure that the Total License count has increased as expected
Troubleshooting SNL issues
- Monitor the SNL Manager periodically to ensure it is functioning correctly and that licenses are available as expected.
- Firewall Configuration: Ensure that any firewalls on the server or client machines allow communication on the specified port used by SNL Manager.
- Regular Updates: Keep both SOLIDWORKS and the SNL Manager software up-to-date to benefit from bug fixes, security patches, and compatibility improvements.
- If you encounter any issues during activation, SOLIDWORKS provides detailed online documentation and support resources. Common issues include network configuration problems or incorrect serial number entries.
- If you are unable to resolve the issue yourself, reach out to your SOLIDWORKS reseller for assistance.
By following these steps, you can successfully install and configure SOLIDWORKS SNL Manager on your server, allowing multiple users to share a pool of SOLIDWORKS licenses.
Install the SNL Manager:
- Double-click the installer on the server machine to extract and launch the SOLIDWORKS install wizard.
- In the install wizard, select "Install server components", check the checkbox for "Install SolidNetwork License Manager" and then click "Next"